What's next

What's Next


The team at Family Pools are on-site, preparing a new pool construction project

Pre-Construction Walkthrough & What to Expect

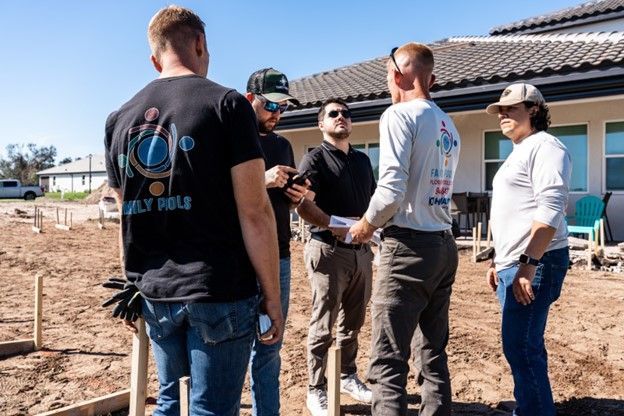
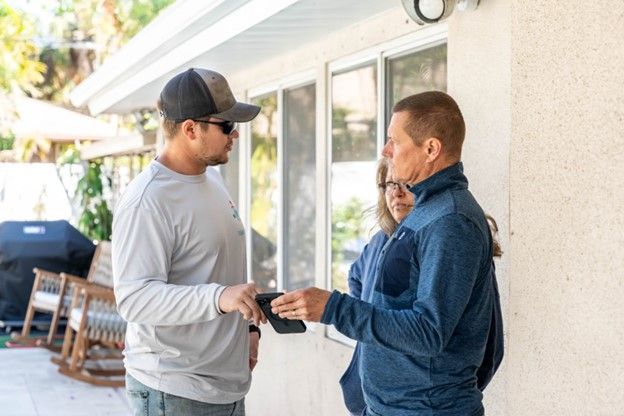
Before construction begins, you'll be introduced to the first of three dedicated project managers—your trusted point of contacts who’ll be with you every step of the way. During this visit, we’ll walk the property together, answer any questions you may have, and go over how the process will unfold.


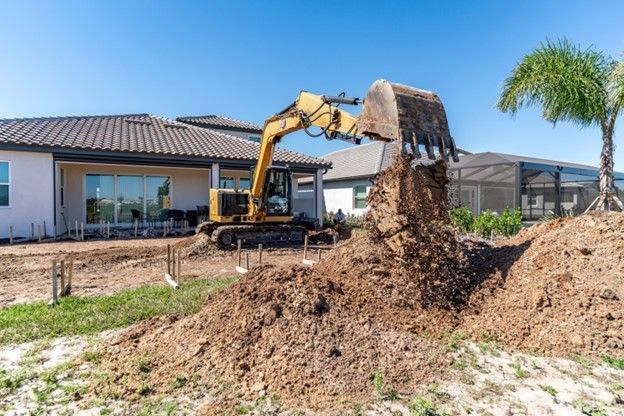
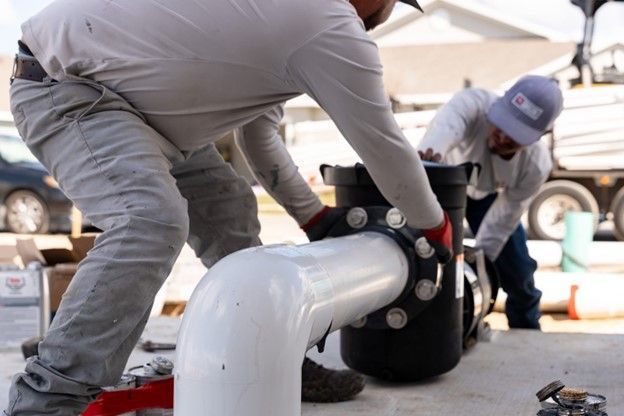
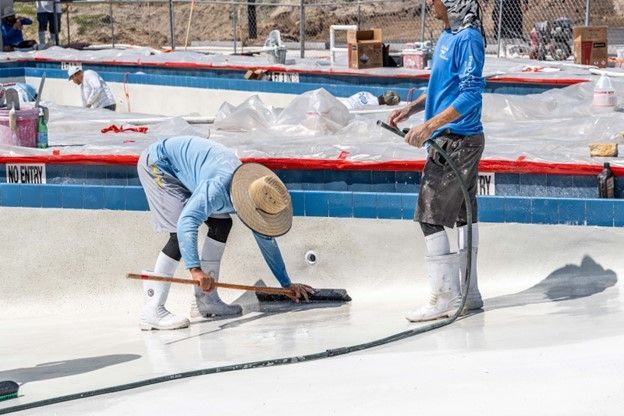
Materials are usually delivered within the following day or shortly after, so we’re ready to roll without delay.


We also take a moment to connect with your neighbors—just a friendly hello and a letter letting them know what to expect. The letter includes our standard working hours, typically Monday through Saturday, from dawn to dusk. It’s our way of showing respect for the community and keeping everyone in the loop.


Lastly, before any work begins, we document any existing damage on neighboring properties to ensure everything is properly recorded and prepared ahead of construction. Transparency is key, and we’re all about keeping things smooth and stress-free from day one.

Member of the Family Pools team taking notes for preparation of a new work site

Site Preparation

Once the pre-construction steps are complete, we move into preparing the site for the build. This phase is all about creating a safe, clean, and well-organized space to begin construction.


Before we start clearing anything, we contact 811 (Call Before You Dig) to have all underground utilities properly marked. Safety is a top priority, and this step ensures we avoid any issues with gas, electric, or water lines during excavation.


Next, we implement erosion control measures to protect your property and surrounding areas from soil runoff during construction. This might include silt fencing, straw wattles, or other industry-standard practices, depending on your site.


Once that’s handled, we begin clearing the area—removing vegetation, debris, and anything else that might be in the way. We use professional-grade equipment like excavators, track loader, and more to get everything leveled and ready.


This step lays the groundwork (literally) for a smooth and safe construction process, and we handle it with precision, care, and attention to detail.

An excavator is on a job site digging the foundation for a new pool

Excavation & Creating the Layout

Now the fun part starts—bringing your pool’s shape to life! We begin by carefully marking out the exact layout of your pool on-site, ensuring everything matches the design plan to a tee.


Once the layout is confirmed, we roll in the heavy machinery to start excavation. Our crew digs out the shape, depth, and contour of your pool, removing soil and debris to sculpt the space just right. It’s precision work, and our team treats it like an art form.


After the dig is complete, we reinforce the walls and floor of the pool using steel rebar to create a strong structural foundation. At this stage, we also install the pre-plumb lines, which will later connect to your pool’s equipment system.


Once everything is in place, we schedule a required inspection to ensure the work meets all safety and structural standards before we move on to the next phase. (LDS)

A Family Pools worker is creating a new pool shell

Shooting the Pool

With the steel rebar in place and inspected, it’s time to bring the pool shell to life. This phase—known as “shooting the pool”—is where structure meets craftsmanship.


Our skilled crew applies shotcrete, a specialized concrete mix, using high-pressure hoses to cover the pool’s walls and floor. This process allows us to sculpt the pool’s shape with precision, creating a strong, smooth, and long-lasting foundation.


Once the shotcrete is in place, the surface needs time to cure properly—a critical step that strengthens the shell and ensures the durability of your pool for years to come.


It’s a major milestone—and it’s when your pool really starts to take shape!

A new pool shell is being prepared for grading

Strip & Grade

Now that the pool shell is in place and cured, it’s time to prep the surrounding area for the next steps. First, we remove the wooden forms used to shape the pool during the shotcrete phase. Once those are cleared, we backfill the area around the pool with dirt to start leveling things out.


This process, known as grading, creates a clean and even surface around the pool—setting the stage for rough plumbing.

Pre-plumbed lines of a new swimming pool that is under construction

Rough Plumbing

With the site graded and ready, we move into the rough plumbing phase. This is where things start connecting behind the scenes to bring your pool to life.


Our crew links the pre-plumbed lines (installed during excavation) to the area where your equipment pad will be located—this includes connections for water circulation, filtration, and any additional features like bubblers, waterfalls, or spas.


Everything is carefully laid out and pressure-tested to ensure your plumbing system is solid, leak-free, and ready to perform when it's time to dive in.

Footers

If you're adding a pool cage—now or even down the road—this is the time to set the foundation. Footers are key to keeping the cage anchored and secure, but even if you’re not planning on installing one, they’re still a smart addition to help stabilize your deck over time.

We begin by digging trenches around the perimeter of the area. Then, concrete is poured into the trenches to form strong, supportive footers that tie into the rest of the build.

They’re designed to hold firm, especially during Florida’s unpredictable weather, giving your pool area extra protection and peace of mind.


Mud, Tile & Coping

Now it’s time to start adding some personality and polish to your pool! This phase kicks off with “mud” work—a layer of mortar that preps the surface for tile and coping installation.


Next, we install your waterline tile, which not only adds a beautiful design element but also helps protect the pool’s finish over time. Whether you’ve chosen something sleek and modern or vibrant and bold, this is where your style starts to shine through.


We also install the coping—the stone or concrete edging around the top of the pool shell. It acts as a transition between the pool and deck while providing both function and flair.


At this stage, your pool starts to feel less like a construction zone and more like a backyard retreat in the making.

A pool builder is installing the deck for a new pool

Deck

Before we install your deck, we start with two essential steps to ensure long-term stability and prevent settling.


First, we water jet around the pool shell—a process that uses high-pressure water to help the surrounding dirt settle and compact underneath the shell. This creates a solid foundation and eliminates air pockets that could cause shifting down the line.


Next, we bring in 2 to 4 inches of crushed concrete, compacting it in layers every two inches. This provides a strong, even base that supports your deck beautifully and helps maintain its level for years to come.


Once the prep work is complete, it’s time to lay down your chosen materials—whether it’s pavers, travertine, or marble—to create a stylish, durable surface that ties your outdoor space together.


This is where your backyard really starts to transform into the oasis you’ve been dreaming of.

Pool builders at Family Pools are installing a new pump

Equipment Installation

Now it’s time to bring your pool to life with the installation of all essential equipment systems—including the pump, filter, heater, and any custom features like automation, saltwater systems, lighting, or water features.


Our crew sets up everything on a clean, organized equipment pad, ensuring each component is properly connected and tested for peak performance and efficiency. This setup is designed not just to work great, but to be easy to maintain over time.


It’s also worth noting: this phase doesn’t have to follow a strict timeline. Equipment installation can happen after footers, during tile and coping, or even while the deck is being installed. Our team coordinates everything to keep the project moving smoothly and efficiently without missing a beat.


This is the engine behind your entire pool system—and we make sure it’s running perfectly from the start.

A licensed electrician is connecting the electrical system of a new swimming pool

Electrical Hookup

Powering your pool is a crucial step—and it’s all handled by a licensed electrician who ensures everything is wired safely and up to code.


They’ll begin by selecting the proper gauge wire and conduit for your specific setup. A GFCI (Ground Fault Circuit Interrupter) is installed for added safety, and wiring is run to all pool equipment. The electrician will also install a complete bonding system, which helps prevent electrical hazards by grounding the entire structure.


Once everything is in place, the system is thoroughly tested to confirm proper grounding and functionality. After that, we call in an electrical inspection to make sure everything is approved before we move forward.


This step ensures your pool operates safely and efficiently—so when it’s time to flip the switch, everything runs exactly as it should.

A newly built swimming pool with a pool cage around it

Cage Installation

Once the major structural work is complete, it’s time to enclose your outdoor space with a pool cage—providing shade, safety, and year-round enjoyment.


At this stage, our trusted third-party cage company steps in to handle the installation. The cage frame is built using aluminum columns, carefully assembled to match the layout of your pool and deck. A durable mesh screen is then installed to keep out debris and pests while still letting the breeze and sunlight through.


Access doors are added for easy entry and exit, and any necessary reinforcements are installed to ensure the cage is built to withstand the elements.


Once the structure is complete, an inspection is called specifically for the cage, but this is not the final inspection for the overall project.

A  pool installer is applying the interior finish to a newly build swimming pool

Prep & Finish Material

Now it’s time for the final touch inside the pool—the interior finish that brings the whole look together.


First, the pool shell is thoroughly cleaned and prepped, ensuring the surface is smooth, free of debris, and ready for application.


From there, your chosen finish—whether it’s tile, pebble, or quartz—is carefully applied in layers by skilled professionals. This step not only defines the look and feel of your pool, but it also plays a major role in its durability, texture, and long-term performance.


The right finish, installed the right way, makes all the difference—and we make sure it’s done with precision and care.

A new swimming pool is being filled with water

Filling the Pool

With the finish complete, it’s finally time to fill your pool with water—a major milestone that means you're almost ready to enjoy your new backyard escape!


The time it takes to fill the pool depends on a few factors, including the size of the pool, water flow rate, water pressure, and your water source. For an average-sized pool, it typically takes anywhere from several hours to a full day or two.


Once the pool is completely filled, we schedule the final inspection to ensure everything is safe, complete, and ready for the final phase of the process.

View of a new swimming pool

Punchlist / Start-Up

As your pool nears completion, we enter the final stage: Punchlist & Start-Up. This is where we fine-tune every last detail to make sure your pool is absolutely perfect.


The punchlist is a checklist of any small items or touch-ups that need to be corrected—things like minor adjustments, finish cleanups, or hardware tweaks. These are all handled during your 30-day start-up period.


During this time, our team services your pool twice a week to ensure everything is functioning properly. We closely monitor water chemistry, balance the pool, and brush the surface regularly to help the interior finish cure evenly and beautifully.


It’s all part of delivering a top-quality result—and making sure your pool is 100% ready for years of enjoyment.

Member of pool installation team talking with clients

Pool School - Learning to use the equipment and the phone app

Maintenance

Now that your dream pool is complete, the only thing left to do is enjoy it—and keep it sparkling. That’s where our weekly maintenance service comes in.


Our team takes care of everything: we skim the surface, brush the walls, vacuum the pool, and balance all chemicals to keep your water clean, clear, and swim-ready at all times.


After each visit, you’ll receive a detailed email report showing your chemical levels, a breakdown of the work performed, and even a photo confirming that your maintenance was completed.


It’s peace of mind, every week—because we believe a beautiful pool should also be a stress-free one.